
本来はArducamPico4MLを使うところですが、手元にバラであるものを集めてやってみます。
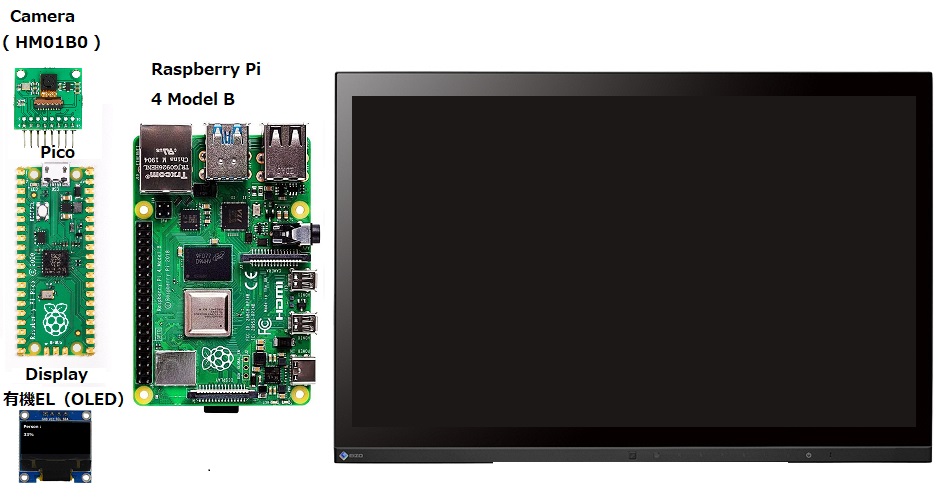
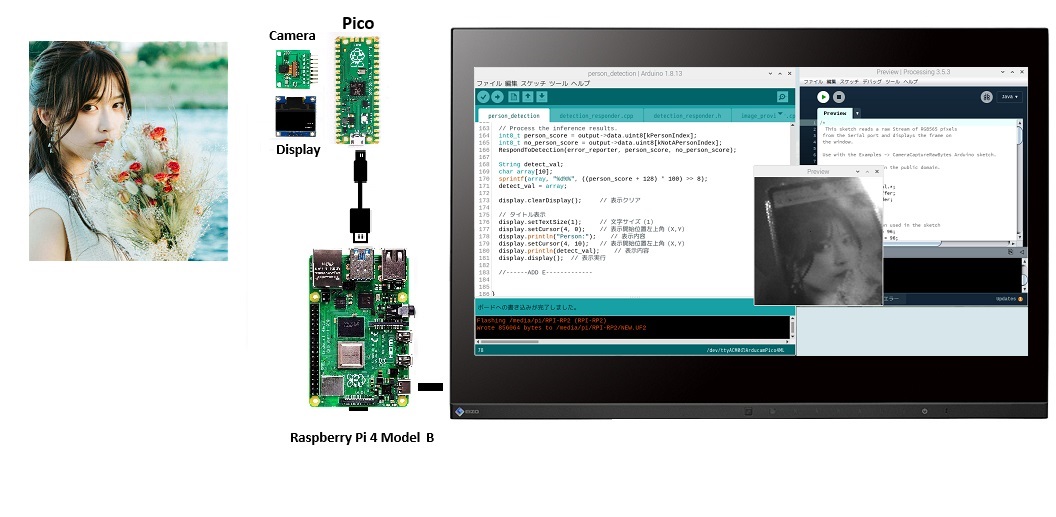
こういう構成です。
ArducamPico4ML ではカメラ画像や検出結果の表示にLCD ディスプレイのST7735 を使っていますが、手元に無かったので結果の表示に有機EL(OLED)ディスプレイ、カメラ画像表示は母艦のラズパイ経由でProcessing を使ってみます。
開発環境はArduino IDE です。
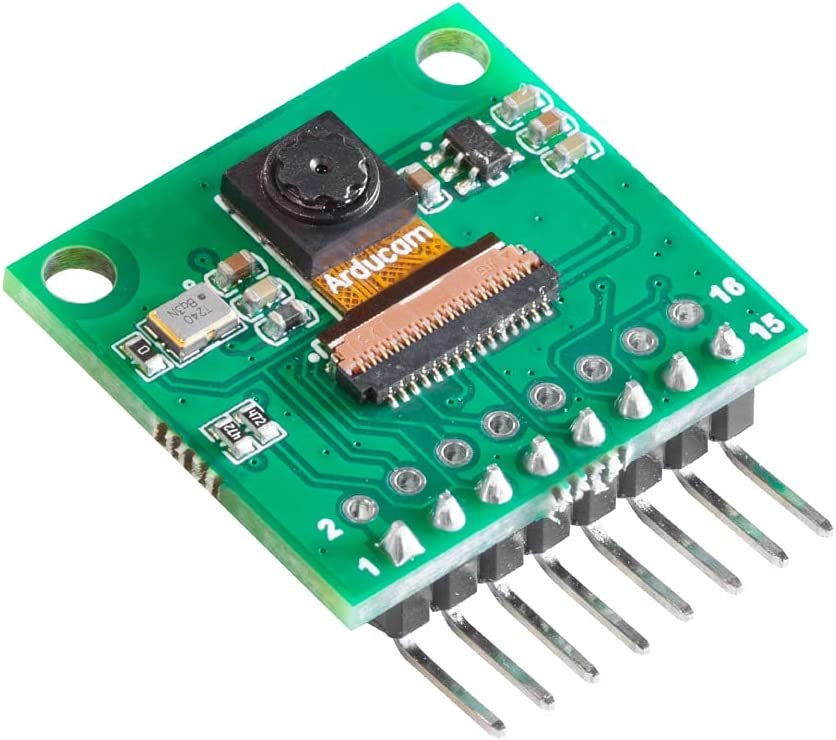
カメラ(HM01B0)設定や画像の取得は以下を参照
カメラとPico との結線については以下を参照
Pi Pico でエッジAI を試してみる:カメラ設定編(HM01B0)
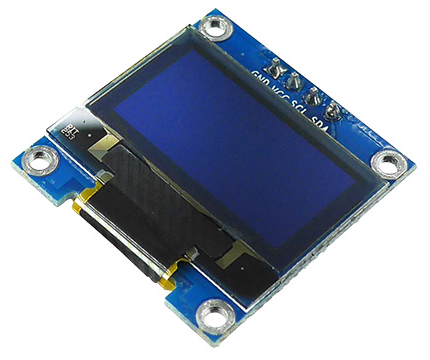
有機EL(OLED)ディスプレイに関しては以下を参照
Pi Pico (W) に有機EL (OLED) ディスプレイ:Arduino IDE
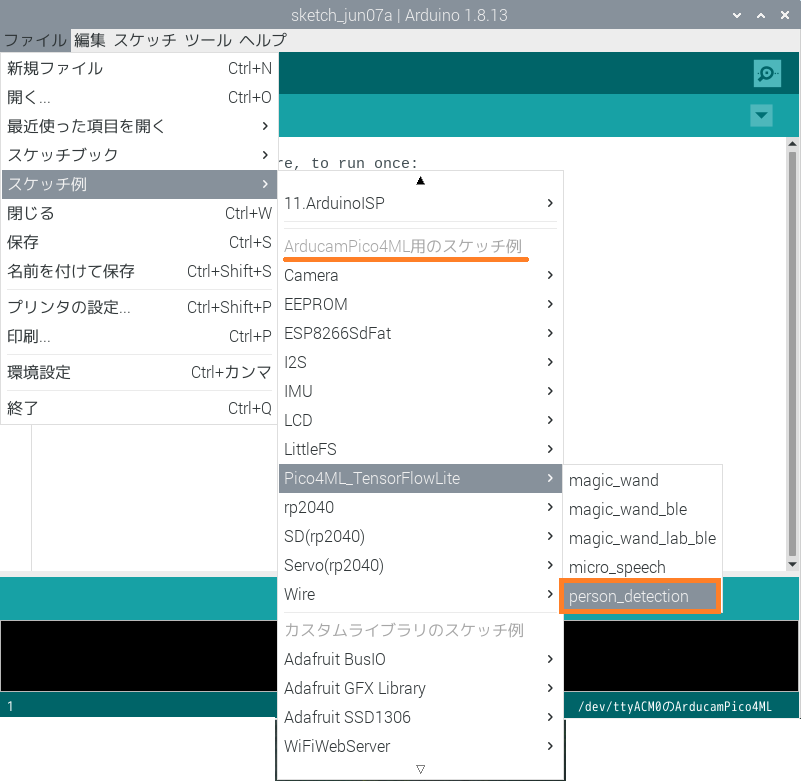
ベースになるサンプルコードはスケッチ例の中の、person_detection です。
このコードをベースにして上記、カメラとディスプレイのコードをジョイントして、ArducamPico4MLと同じようなことをやってみます。
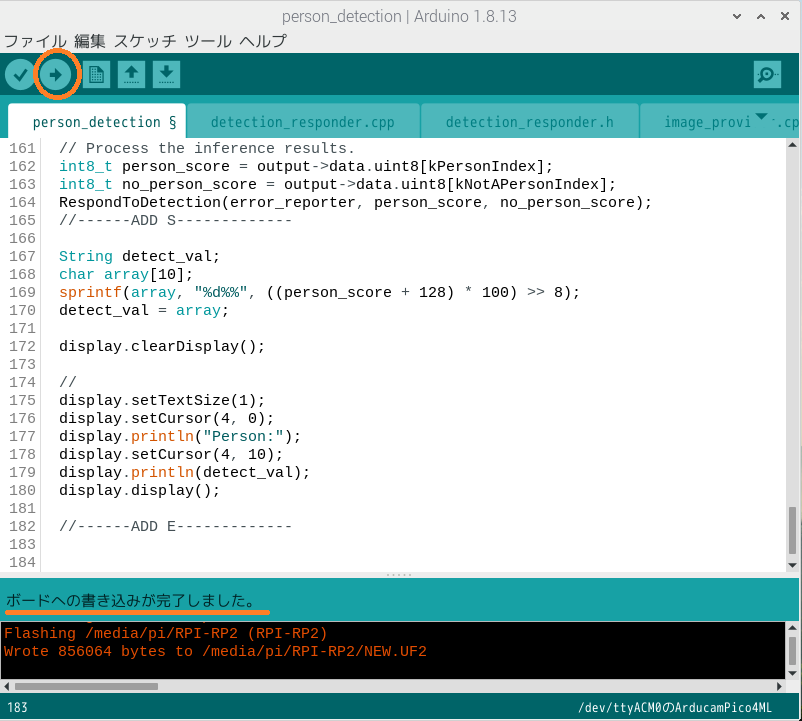
person_detectionの中の2つのファイル(person_detection.ino、image_provider.cpp)を改変します。
以下の2行に挟まれたコードが追加された部分です。
//——ADD S————-
//——ADD E————-
オリジナルコードの中のST7735に関連した部分は削除しています(オリジナルのif SCREEN の部分)。
代わりに表示には有機EL(OLED)を使います。
【person_detection.ino】
|
1 2 3 4 5 6 7 8 9 10 11 12 13 14 15 16 17 18 19 20 21 22 23 24 25 26 27 28 29 30 31 32 33 34 35 36 37 38 39 40 41 42 43 44 45 46 47 48 49 50 51 52 53 54 55 56 57 58 59 60 61 62 63 64 65 66 67 68 69 70 71 72 73 74 75 76 77 78 79 80 81 82 83 84 85 86 87 88 89 90 91 92 93 94 95 96 97 98 99 100 101 102 103 104 105 106 107 108 109 110 111 112 113 114 115 116 117 118 119 120 121 122 123 124 125 126 127 128 129 130 131 132 133 134 135 136 137 138 139 140 141 142 143 144 145 146 147 148 149 150 151 152 153 154 155 156 157 158 159 160 161 162 163 164 165 166 167 168 169 170 171 172 173 |
#include <TensorFlowLite.h> #include "main_functions.h" #include <arducampico.h> #include <hardware/irq.h> #include "detection_responder.h" #include "image_provider.h" #include "model_settings.h" #include "person_detect_model_data.h" #include "tensorflow/lite/micro/micro_error_reporter.h" #include "tensorflow/lite/micro/micro_interpreter.h" #include "tensorflow/lite/micro/micro_mutable_op_resolver.h" #include "tensorflow/lite/schema/schema_generated.h" #include "tensorflow/lite/version.h" //------ADD S------------- #include <stdio.h> #include "pico/stdlib.h" #include "arducampico.h" #include <Adafruit_GFX.h> #include <Adafruit_SSD1306.h> // OLED #define SCREEN_WIDTH 128 #define SCREEN_HEIGHT 64 #define OLED_RESET -1 Adafruit_SSD1306 display(SCREEN_WIDTH, SCREEN_HEIGHT, &Wire, OLED_RESET); //------ADD E------------- // Globals, used for compatibility with Arduino-style sketches. namespace { tflite::ErrorReporter* error_reporter = nullptr; const tflite::Model* model = nullptr; tflite::MicroInterpreter* interpreter = nullptr; TfLiteTensor* input = nullptr; // In order to use optimized tensorflow lite kernels, a signed int8_t quantized // model is preferred over the legacy unsigned model format. This means that // throughout this project, input images must be converted from unisgned to // signed format. The easiest and quickest way to convert from unsigned to // signed 8-bit integers is to subtract 128 from the unsigned value to get a // signed value. // An area of memory to use for input, output, and intermediate arrays. constexpr int kTensorArenaSize = 136 * 1024; static uint8_t tensor_arena[kTensorArenaSize]; } // namespace // The name of this function is important for Arduino compatibility. void setup() { Serial.begin(115200); //------ADD S------------- gpio_init(PIN_LED); gpio_set_dir(PIN_LED, GPIO_OUT); //Display Wire.setSDA(0); //OLED SDA Wire.setSCL(1); //OLED SCL Wire.begin(); //初期設定、文字の色は白 if (!display.begin(SSD1306_SWITCHCAPVCC, 0x3C)) { Serial.println(F("SSD1306:0 allocation failed")); for (;;); } // display.setTextColor(SSD1306_WHITE); //------ADD E------------- // // Set up logging. Google style is to avoid globals or statics because of // lifetime uncertainty, but since this has a trivial destructor it's okay. // NOLINTNEXTLINE(runtime-global-variables) static tflite::MicroErrorReporter micro_error_reporter; error_reporter = µ_error_reporter; // Map the model into a usable data structure. This doesn't involve any // copying or parsing, it's a very lightweight operation. model = tflite::GetModel(g_person_detect_model_data); if (model->version() != TFLITE_SCHEMA_VERSION) { TF_LITE_REPORT_ERROR(error_reporter, "Model provided is schema version %d not equal " "to supported version %d.", model->version(), TFLITE_SCHEMA_VERSION); return; } // Pull in only the operation implementations we need. // This relies on a complete list of all the ops needed by this graph. // An easier approach is to just use the AllOpsResolver, but this will // incur some penalty in code space for op implementations that are not // needed by this graph. // // tflite::AllOpsResolver resolver; // NOLINTNEXTLINE(runtime-global-variables) static tflite::MicroMutableOpResolver<5> micro_op_resolver; micro_op_resolver.AddAveragePool2D(); micro_op_resolver.AddConv2D(); micro_op_resolver.AddDepthwiseConv2D(); micro_op_resolver.AddReshape(); micro_op_resolver.AddSoftmax(); // Build an interpreter to run the model with. // NOLINTNEXTLINE(runtime-global-variables) static tflite::MicroInterpreter static_interpreter( model, micro_op_resolver, tensor_arena, kTensorArenaSize, error_reporter); interpreter = &static_interpreter; // Allocate memory from the tensor_arena for the model's tensors. TfLiteStatus allocate_status = interpreter->AllocateTensors(); if (allocate_status != kTfLiteOk) { TF_LITE_REPORT_ERROR(error_reporter, "AllocateTensors() failed"); return; } // Get information about the memory area to use for the model's input. input = interpreter->input(0); TfLiteStatus setup_status = ScreenInit(error_reporter); if (setup_status != kTfLiteOk) { TF_LITE_REPORT_ERROR(error_reporter, "Set up failed\n"); } } // The name of this function is important for Arduino compatibility. void loop() { // gpio_put(PIN_LED, !gpio_get(PIN_LED)); // // Get image from provider. if (kTfLiteOk != GetImage(error_reporter, kNumCols, kNumRows, kNumChannels, input->data.int8)) { TF_LITE_REPORT_ERROR(error_reporter, "Image capture failed."); } // Run the model on this input and make sure it succeeds. if (kTfLiteOk != interpreter->Invoke()) { TF_LITE_REPORT_ERROR(error_reporter, "Invoke failed."); } TfLiteTensor* output = interpreter->output(0); // Process the inference results. int8_t person_score = output->data.uint8[kPersonIndex]; int8_t no_person_score = output->data.uint8[kNotAPersonIndex]; RespondToDetection(error_reporter, person_score, no_person_score); //------ADD S------------- //Person score を有機ELに表示 String detect_val; char array[10]; sprintf(array, "%d%%", ((person_score + 128) * 100) >> 8); detect_val = array; display.clearDisplay(); // display.setTextSize(1); display.setCursor(4, 0); display.println("Person:"); display.setCursor(4, 10); display.println(detect_val); display.display(); //------ADD E------------- } |
【image_provider.cpp】
3行目の#include <Arduino.h>はこのソースのスコープでSerial.writeを実行するために必要です。
|
1 2 3 4 5 6 7 8 9 10 11 12 13 14 15 16 17 18 19 20 21 22 23 24 25 26 27 28 29 30 31 32 33 34 35 36 37 38 39 40 41 42 43 44 45 46 47 48 49 50 51 52 53 54 55 56 57 58 |
//------ADD S------------- #include <Arduino.h> //------ADD E------------- #include "image_provider.h" #include "model_settings.h" #include "arducampico.h" struct arducam_config config; //------ADD S------------- uint8_t header[2] = {0x55,0xAA}; //------ADD E------------- TfLiteStatus ScreenInit(tflite::ErrorReporter *error_reporter) { config.sccb = i2c0; config.sccb_mode = I2C_MODE_16_8; config.sensor_address = 0x24; config.pin_sioc = PIN_CAM_SIOC; config.pin_siod = PIN_CAM_SIOD; config.pin_resetb = PIN_CAM_RESETB; config.pin_xclk = PIN_CAM_XCLK; config.pin_vsync = PIN_CAM_VSYNC; config.pin_y2_pio_base = PIN_CAM_Y2_PIO_BASE; config.pio = pio0; config.pio_sm = 0; config.dma_channel = 0; arducam_init(&config); return kTfLiteOk; } TfLiteStatus GetImage(tflite::ErrorReporter *error_reporter, int image_width, int image_height, int channels, int8_t *image_data) { arducam_capture_frame(&config, (uint8_t *)image_data); //------ADD S------------- //カメラ画像をProcessingに投げる準備です Serial.write(header,2); delay(5); Serial.write((uint8_t *)image_data,96*96); //------ADD E------------- for (int i = 0; i < image_width * image_height * channels; ++i) { image_data[i] = (uint8_t)image_data[i] - 128; } return kTfLiteOk; } |
コードをコンパイルしてPico に書き込みます。コードが書き込まれると即Pico は再起動され人物検出のTinyMLの推論プロセスが実行されます。
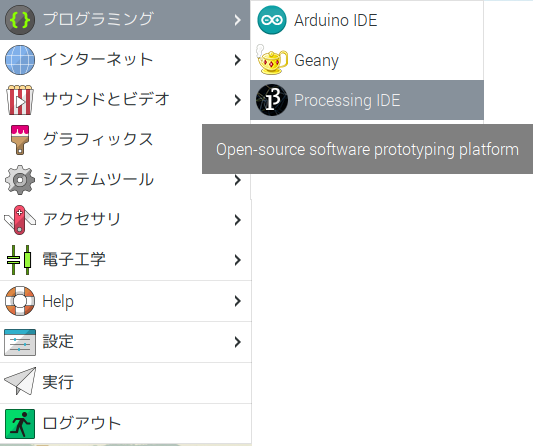
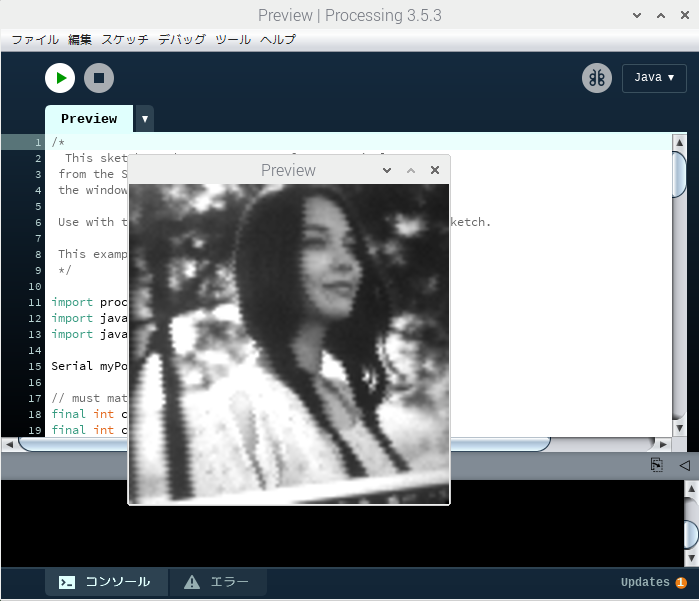
processing を起動してpreview.pdeでシリアルに流れてくる画像を取得します。
Pi Pico でエッジAI を試してみる(1)カメラの5/5参照
カメラで写真の人物を検出してみます
Processing 表示用のスクリプト
https://github.com/ArduCAM/RPI-Pico-Cam/blob/master/rp2040_hm01b0/display/preview.pde
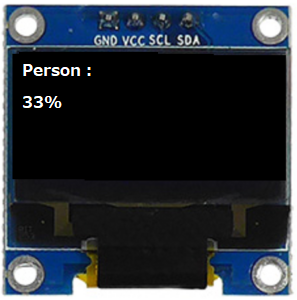
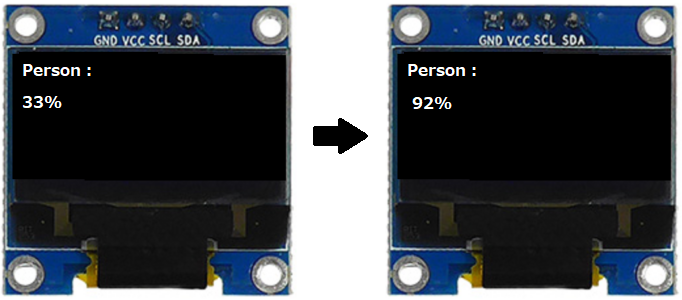
ディスプレイの表示
写真の人物が写りこんでいる場合とそうじゃない場合で値が違うので何らかの結果を反映しているのは確からしいのですが、この値が真かどうかは不明です….。
でも、やはりこのカメラの解像度の低さが気になります。
Next
カメラをOV2640使用2MP(Mega Pixel)に変えてArduCAM/RPI-Pico-Cam のやり方で再チャレンジしてみます。
Pi Pico でエッジAI を試してみる(2-2)人物検出(Person Detection)by B0067
addition
人物画像を映しこむとスコアが上がったので、解像度は関係なさそうです。
多分これで正解。
Leave a Reply