
前回のPi Pico W にWebサーバーを建てていくつかサービスを実行してみるでは、開発環境にMicroPython を使いましたが、今回はArduino IDE でやってみます。
ブラウザーの見た目は同じようなもんですが、取得している温度が高めです。使っている関数が甘めなのか、内部温度センサーはRP2040チップの近くにあるのでその影響がそのまま出ています。
母艦はラズパイ4Model B を使います。
開発環境は以下を参照
Arduino IDE を使ってみる
ラズパイ4 Model B にRaspberry Pi OS 64bit Desktopを入れておきます。
出荷時状態のPico W をUSBケーブルでラズパイに接続。
Arduino IDE を起動
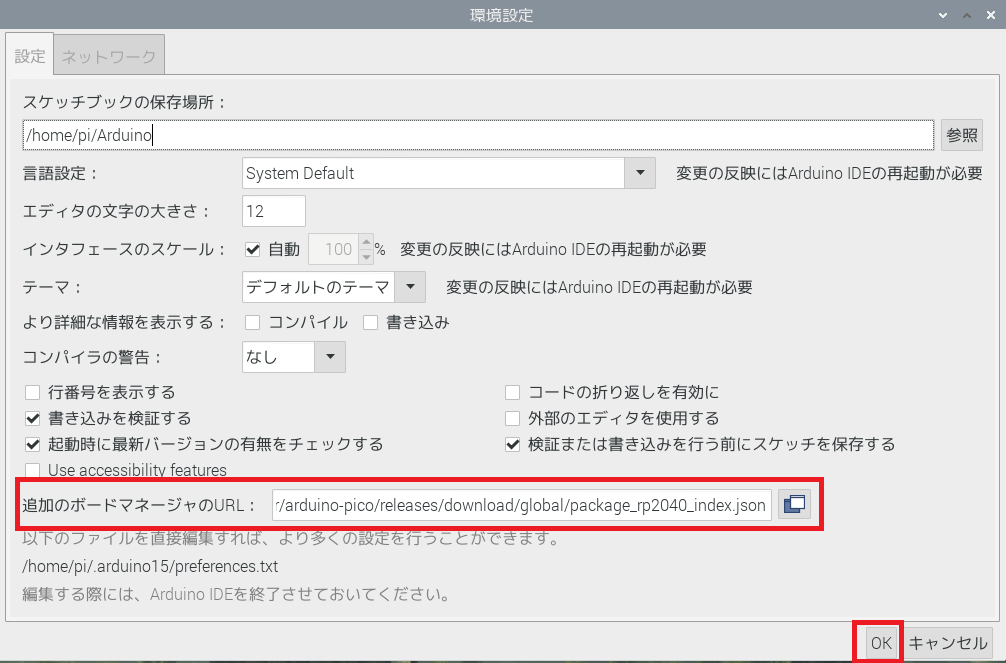
ファイルー>環境設定
追加のボードマネージャーのURL に以下を入力してOKで閉じます。
https://github.com/earlephilhower/arduino-pico/releases/download/global/package_rp2040_index.json
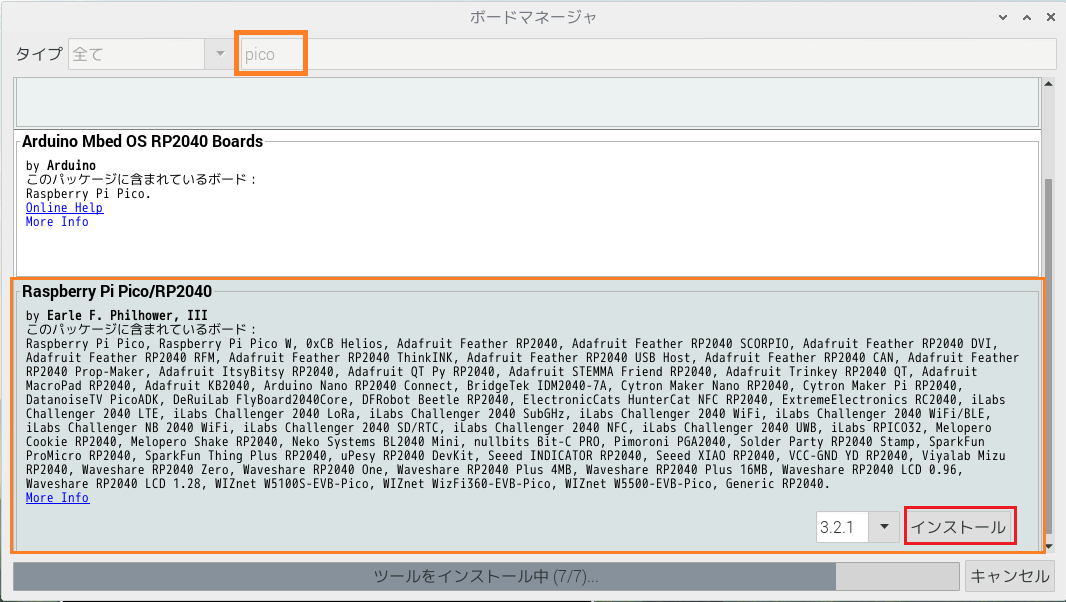
ツールー>ボードー>ボードマネージャーを選択
検索フィールドにpico を入力して、Raspberry Pi Pico /RP2040 をインストールします。
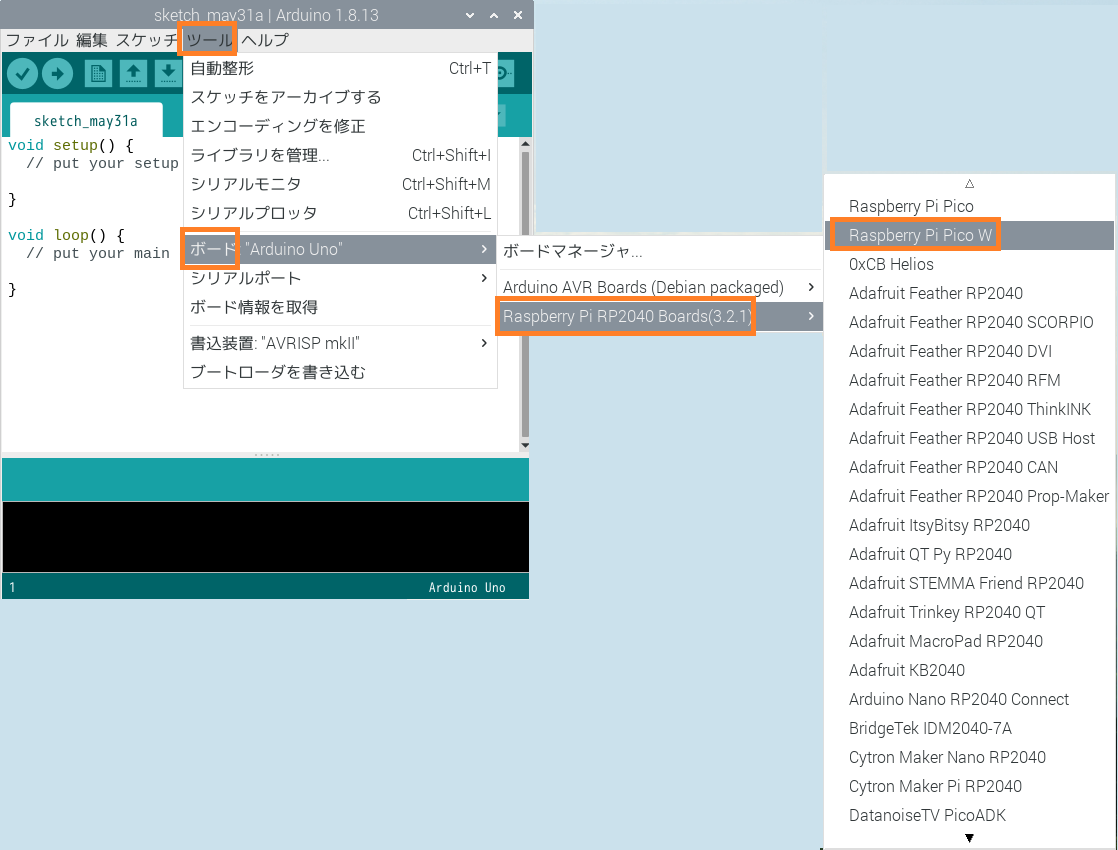
ツールー>ボードからRaspberry Pi Pico W をアサインします。
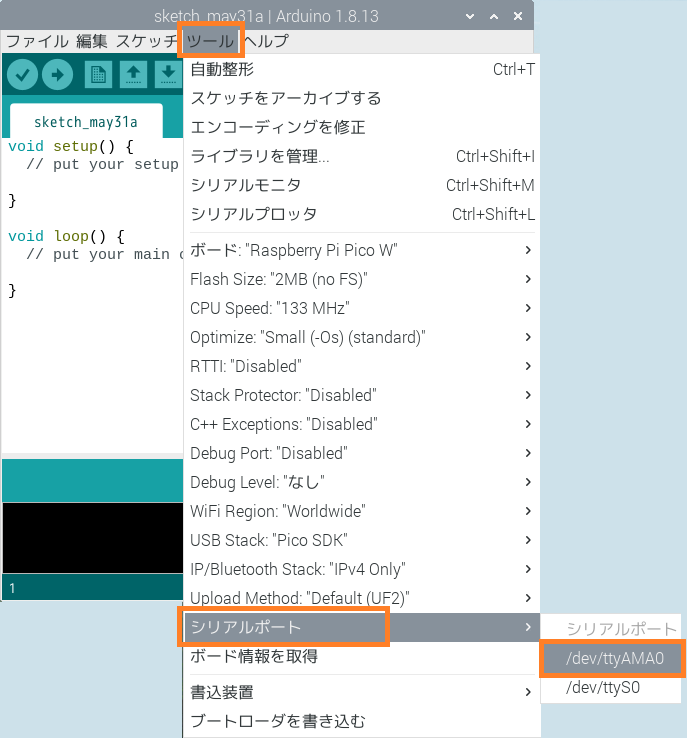
シリアルポートでは初期状態のポート番号を設定
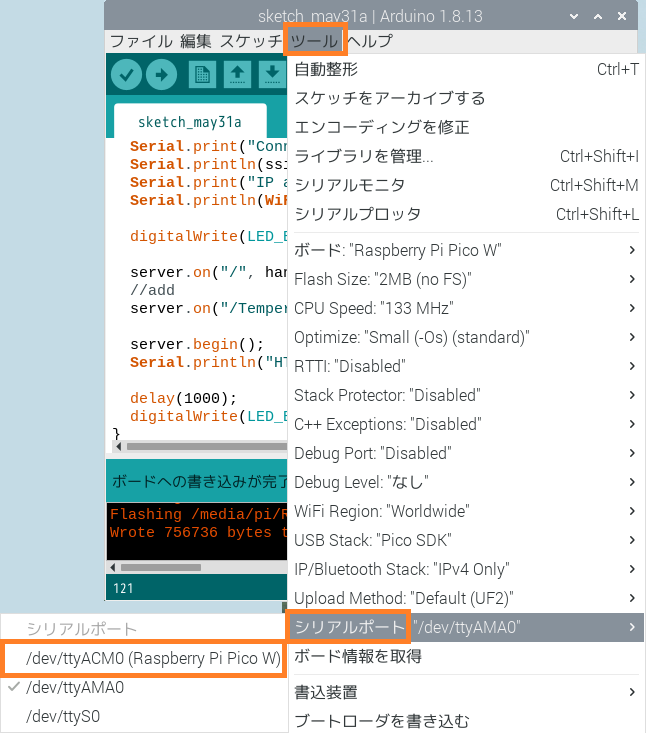
後でコードをコンパイルしてファームウェアをインストールした場合、Pico が再起動されるとポート番号は変わります。
次に示すような内部温度センサーを読んで表示するようなクライアント用コードを実装してみます。
温度取得表示コード
SSID とパスワードは自分の環境で書き直してください。
|
1 2 3 4 5 6 7 8 9 10 11 12 13 14 15 16 17 18 19 20 21 22 23 24 25 26 27 28 29 30 31 32 33 34 35 36 37 38 39 40 41 42 43 44 45 46 47 48 49 50 51 52 53 54 55 56 57 58 59 60 61 62 63 64 65 66 67 68 69 70 71 72 73 74 75 76 77 78 79 80 81 82 83 84 85 86 87 88 89 90 91 92 93 94 95 96 97 98 99 100 101 102 103 104 105 106 107 108 109 110 111 |
#include <WiFi.h> #include <WiFiClient.h> #include <WebServer.h> #ifndef STASSID #define STASSID "<SSID>" #define STAPSK "<パスワード>" #endif const char *ssid = STASSID; const char *password = STAPSK; WebServer server(80); //--------------------------------------- String tempBtn = "off"; String tempVal = "none"; void handleRoot() { String html ="<!DOCTYPE html> \n<html lang=\"ja\">"; html +="<head>"; html +="<meta charset=\"utf-8\">"; html +="<title>picoW</title>"; html +="<meta name=\"viewport\" content=\"width=device-width, initial-scale=1\">"; html +="<style>"; html +=".container{"; html +=" max-width: 500px;"; html +=" margin: auto;"; html +=" text-align: center;"; html +=" font-size: 1.2rem;"; html +="}"; html +="span,.pm{"; html +=" display: inline-block;"; html +=" border: 1px solid #ccc;"; html +=" width: 50px;"; html +=" height: 30px;"; html +=" vertical-align: middle;"; html +=" margin-bottom: 20px;"; html +="}"; html +="span{"; html +=" width: 120px;"; html +="}"; html +="button{"; html +=" width: 100px;"; html +=" height: 40px;"; html +=" font-weight: bold;"; html +=" margin-bottom: 20px;"; html +="}"; html +="button.on{ background:white; color:white; }"; html +=".column-2{ max-width:250px; margin:auto; text-align:center; display:flex; justify-content:space-between; flex-wrap:wrap; }"; html +="</style>"; html +="</head>"; html +="<body>"; html +="<div class=\"container\">"; html +="<h3>Pi Pico W Ops</h3>"; html +="<button class=\"" + tempBtn + "\" type=\"button\" ><a href=\"/Temperature\">TEMP</a></button><br>"; html +="<div>"; html +="ぉんど->" + tempVal; html +="</div>"; html +="</div>"; html +="</body>"; server.send(200, "text/HTML", html); } //--------------------------------------- void Temperature(){ tempVal = String(analogReadTemp()); if(tempBtn == "off"){ tempBtn = "on"; }else{ tempBtn = "off"; } handleRoot(); } //--------------------------------------- void setup(void) { pinMode(LED_BUILTIN, OUTPUT); Serial.begin(115200); WiFi.mode(WIFI_STA); WiFi.begin(ssid, password); Serial.println(""); // Wait for connection while (WiFi.status() != WL_CONNECTED) { delay(500); Serial.print("."); } Serial.println(""); Serial.print("Connected to "); Serial.println(ssid); Serial.print("IP address: "); Serial.println(WiFi.localIP()); server.on("/", handleRoot); server.on("/Temperature", Temperature); server.begin(); Serial.println("HTTP server started"); } void loop(void) { server.handleClient(); } |
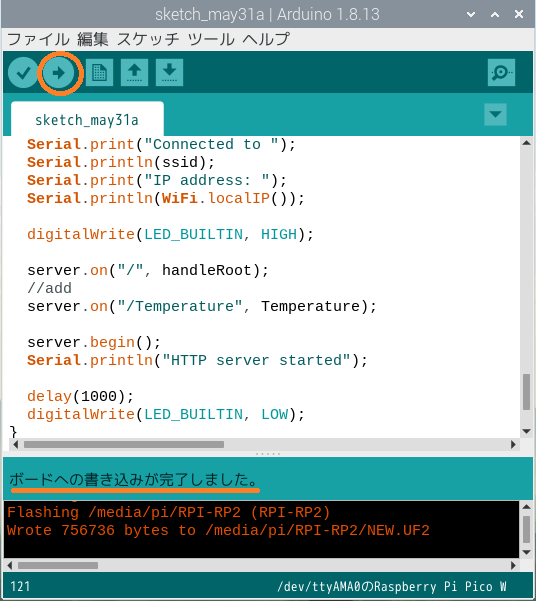
これをコンパイルしてフラッシュメモリーに書き込みます。
コンパイルが完了すると、UF2ファイルとしてPico W のフラッシュメモリーに書き込まれ、その後Pico W は再起動されます。
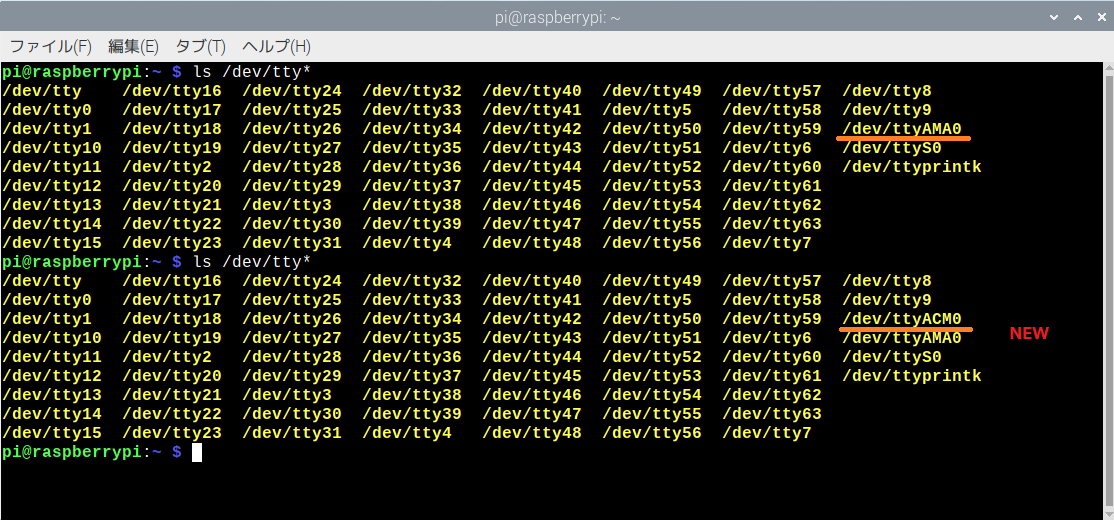
シリアルポートを確認すると新しいポート番号が現れていますので、これを再アサインします。
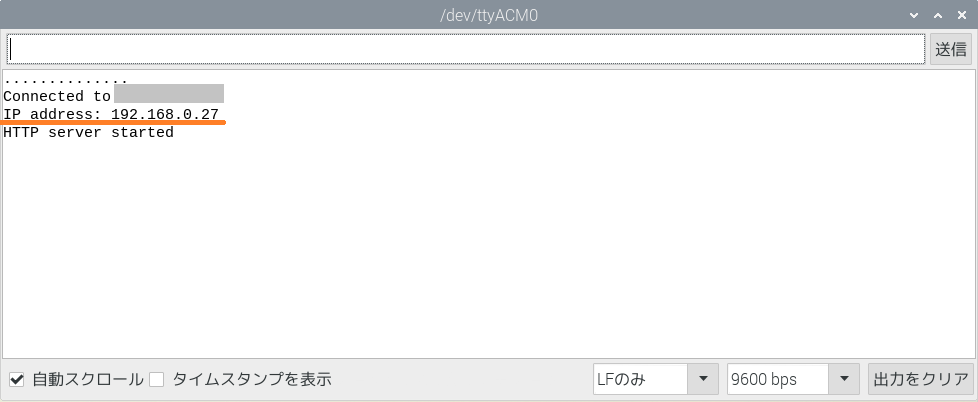
ところで、このサーバーのIPアドレスは何でしょう?
コードではIPアドレスが取得できたら、Serial.print関数で表示するようになっています。
起動時に確認してみます。
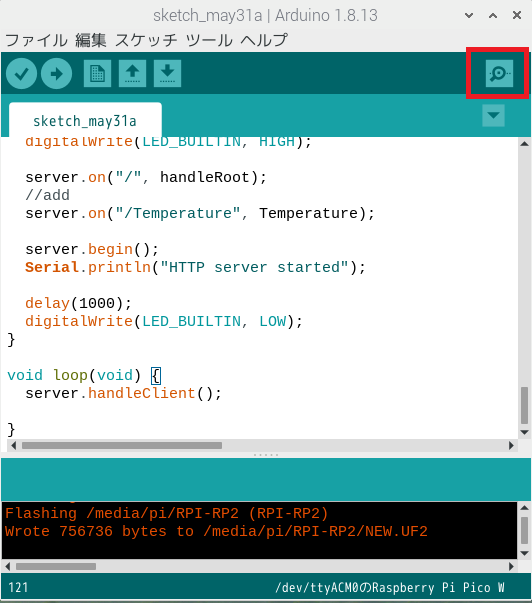
Arduin IDE でシリアルモニターを開いておきます。
この状態で、Pico W をラズパイに接続します。電源が供給されるのでPico は起動を開始します。で、IPアドレスを確認した時点でモニターに表示します。
こんな感じ。
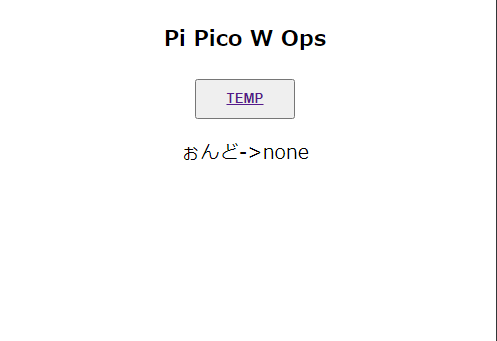
ブラウザーでアクセスします。
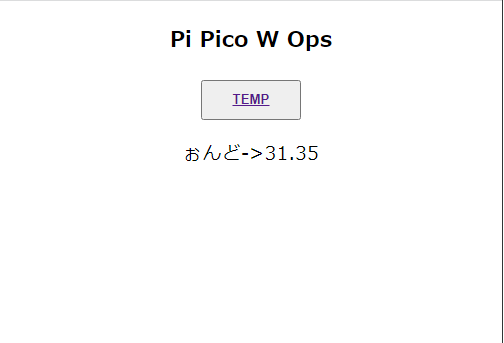
TEMP をクリックして温度取得
今度は、LED を点灯するコードはこんな感じです。
|
1 2 3 4 5 6 7 8 9 10 11 12 13 14 15 16 17 18 19 20 21 22 23 24 25 26 27 28 29 30 31 32 33 34 35 36 37 38 39 40 41 42 43 44 45 46 47 48 49 50 51 52 53 54 55 56 57 58 59 60 61 62 63 64 65 66 67 68 69 70 71 72 73 74 75 76 77 78 79 80 81 82 83 84 85 86 87 88 89 90 91 92 93 94 95 96 97 98 99 100 101 102 103 104 105 106 107 108 109 110 111 112 113 114 115 116 117 118 |
#include <WiFi.h> #include <WiFiClient.h> #include <WebServer.h> #ifndef STASSID #define STASSID "<SSID>" #define STAPSK "<パスワード>" #endif const char *ssid = STASSID; const char *password = STAPSK; WebServer server(80); //--------------------------------------- int State = 0; String ledBtn = "off"; void handleRoot() { String html ="<!DOCTYPE html> \n<html lang=\"ja\">"; html +="<head>"; html +="<meta charset=\"utf-8\">"; html +="<title>picoW</title>"; html +="<meta name=\"viewport\" content=\"width=device-width, initial-scale=1\">"; html +="<style>"; html +=".container{"; html +=" max-width: 500px;"; html +=" margin: auto;"; html +=" text-align: center;"; html +=" font-size: 1.2rem;"; html +="}"; html +="span,.pm{"; html +=" display: inline-block;"; html +=" border: 1px solid #ccc;"; html +=" width: 50px;"; html +=" height: 30px;"; html +=" vertical-align: middle;"; html +=" margin-bottom: 20px;"; html +="}"; html +="span{"; html +=" width: 120px;"; html +="}"; html +="button{"; html +=" width: 100px;"; html +=" height: 40px;"; html +=" font-weight: bold;"; html +=" margin-bottom: 20px;"; html +="}"; html +="button.on{ background:white; color:white; }"; html +=".column-2{ max-width:250px; margin:auto; text-align:center; display:flex; justify-content:space-between; flex-wrap:wrap; }"; html +="</style>"; html +="</head>"; html +="<body>"; html +="<div class=\"container\">"; html +="<h3>Pi Pico W Ops</h3>"; html +="<button class=\"" + ledBtn + "\" type=\"button\" ><a href=\"/Led\">LED</a></button><br>"; html +="<div>"; html +="LEDの状態:" + ledBtn; html +="</div>"; html +="</div>"; html +="</body>"; server.send(200, "text/HTML", html); } //--------------------------------------- void Led() { if(ledBtn == "off"){ ledBtn = "on"; State = 1; }else{ ledBtn = "off"; State = 0; } handleRoot(); } //--------------------------------------- void setup(void) { pinMode(LED_BUILTIN, OUTPUT); Serial.begin(115200); WiFi.mode(WIFI_STA); WiFi.begin(ssid, password); Serial.println(""); // Wait for connection while (WiFi.status() != WL_CONNECTED) { delay(500); Serial.print("."); } Serial.println(""); Serial.print("Connected to "); Serial.println(ssid); Serial.print("IP address: "); Serial.println(WiFi.localIP()); server.on("/", handleRoot); server.on("/Led", Led); server.begin(); Serial.println("HTTP server started"); } void loop(void) { server.handleClient(); if(State){ digitalWrite(LED_BUILTIN, HIGH); }else{ digitalWrite(LED_BUILTIN, LOW); } } |
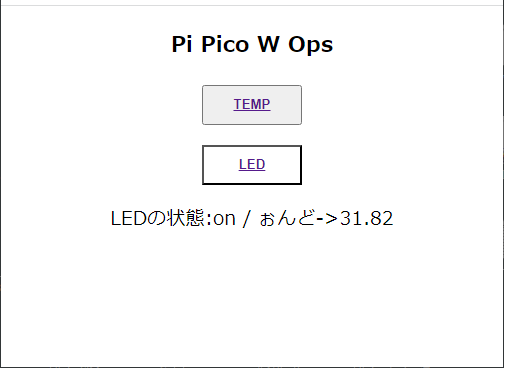
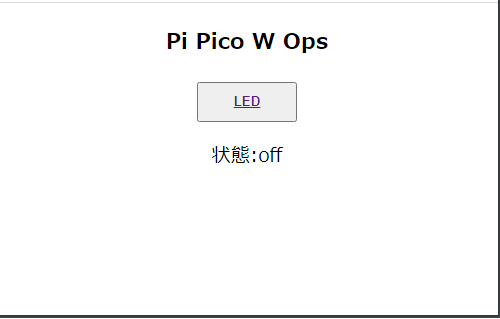
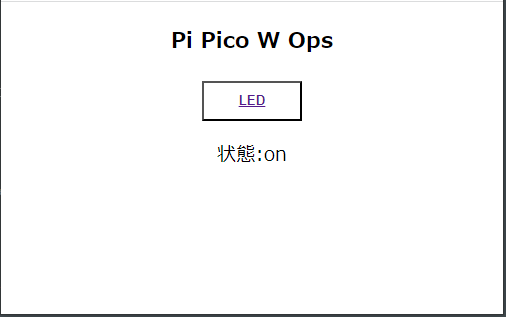
これを実行して、アクセスします。
LEDをクリックするとPico W のLEDが点灯したり消灯したりします。
2つをまとめてみます。
Serverのセットアップが終わるとLED が3回点滅するようにしています。
|
1 2 3 4 5 6 7 8 9 10 11 12 13 14 15 16 17 18 19 20 21 22 23 24 25 26 27 28 29 30 31 32 33 34 35 36 37 38 39 40 41 42 43 44 45 46 47 48 49 50 51 52 53 54 55 56 57 58 59 60 61 62 63 64 65 66 67 68 69 70 71 72 73 74 75 76 77 78 79 80 81 82 83 84 85 86 87 88 89 90 91 92 93 94 95 96 97 98 99 100 101 102 103 104 105 106 107 108 109 110 111 112 113 114 115 116 117 118 119 120 121 122 123 124 125 126 127 128 129 130 131 132 133 134 |
#include <WiFi.h> #include <WiFiClient.h> #include <WebServer.h> #ifndef STASSID #define STASSID "<SSID>" #define STAPSK "<パスワード>" #endif const char *ssid = STASSID; const char *password = STAPSK; WebServer server(80); //--------------------------------------- String tempBtn = "off"; String tempVal = "none"; int State = 0; String ledBtn = "off"; void handleRoot() { String html ="<!DOCTYPE html> \n<html lang=\"ja\">"; html +="<head>"; html +="<meta charset=\"utf-8\">"; html +="<title>picoW</title>"; html +="<meta name=\"viewport\" content=\"width=device-width, initial-scale=1\">"; html +="<style>"; html +=".container{"; html +=" max-width: 500px;"; html +=" margin: auto;"; html +=" text-align: center;"; html +=" font-size: 1.2rem;"; html +="}"; html +="span,.pm{"; html +=" display: inline-block;"; html +=" border: 1px solid #ccc;"; html +=" width: 50px;"; html +=" height: 30px;"; html +=" vertical-align: middle;"; html +=" margin-bottom: 20px;"; html +="}"; html +="span{"; html +=" width: 120px;"; html +="}"; html +="button{"; html +=" width: 100px;"; html +=" height: 40px;"; html +=" font-weight: bold;"; html +=" margin-bottom: 20px;"; html +="}"; html +="button.on{ background:white; color:white; }"; html +=".column-2{ max-width:250px; margin:auto; text-align:center; display:flex; justify-content:space-between; flex-wrap:wrap; }"; html +="</style>"; html +="</head>"; html +="<body>"; html +="<div class=\"container\">"; html +="<h3>Pi Pico W Ops</h3>"; html +="<button class=\"" + tempBtn + "\" type=\"button\" ><a href=\"/Temperature\">TEMP</a></button><br>"; html +="<button class=\"" + ledBtn + "\" type=\"button\" ><a href=\"/Led\">LED</a></button><br>"; html +="<div>"; html +="LEDの状態:" + ledBtn + " / " + "ぉんど->" + tempVal; html +="</div>"; html +="</div>"; html +="</body>"; server.send(200, "text/HTML", html); } //--------------------------------------- void Temperature(){ tempVal = String(analogReadTemp()); if(tempBtn == "off"){ tempBtn = "on"; }else{ tempBtn = "off"; } handleRoot(); } void Led() { if(ledBtn == "off"){ ledBtn = "on"; State = 1; }else{ ledBtn = "off"; State = 0; } handleRoot(); } //--------------------------------------- void setup(void) { pinMode(LED_BUILTIN, OUTPUT); Serial.begin(115200); WiFi.mode(WIFI_STA); WiFi.begin(ssid, password); Serial.println(""); // Wait for connection while (WiFi.status() != WL_CONNECTED) { delay(500); Serial.print("."); } Serial.println(""); Serial.print("Connected to "); Serial.println(ssid); Serial.print("IP address: "); Serial.println(WiFi.localIP()); server.on("/", handleRoot); server.on("/Temperature", Temperature); server.on("/Led", Led); server.begin(); Serial.println("HTTP server started"); } void loop(void) { server.handleClient(); if(State){ digitalWrite(LED_BUILTIN, HIGH); }else{ digitalWrite(LED_BUILTIN, LOW); } } |
これを実行して、アクセスします。
Appendix
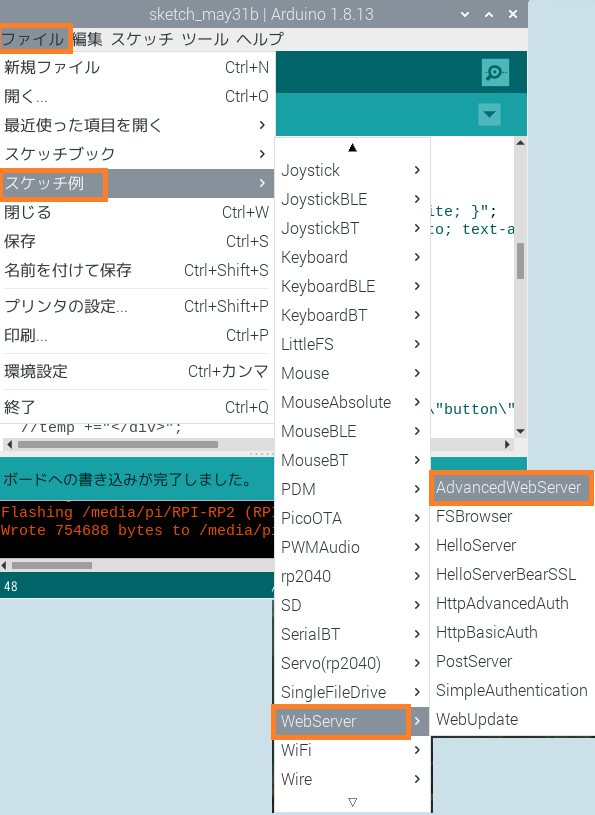
オリジナルコードは以下のスケッチ例で見れます。
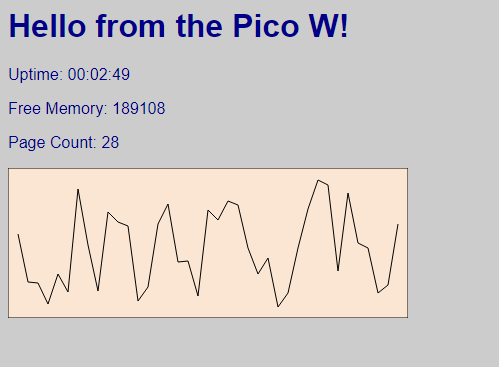
こういうグラフが5秒間隔で更新描画されて、都度LED が点滅します。
Leave a Reply