「Movidius NCS用graphバイナリ作成の手引き」の TensorFlowネットワークのコンパイルのための手引き の項を実際にやってみた例です。
この項ではMNISTを例に学習モデルを作成し、これを使ってGraphバイナリーの作り方を説明しています。
MNISTについて、それって何の場合はここもご参照ください
いきなりフレームワークからではなく、スクラッチから実装する場合です、これならCPUのみでも実行できます、でもCPUのみを使うのであればJetsonよりPCの方がいいでしょう。
クラシックですが、基礎を学べます。でも、より「今時」なものをやりたい向きには合いませんですね、ハイ。
やってみます。
学習モデルの作成
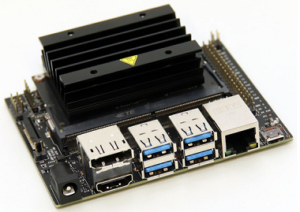
学習環境にNVIDIA GPUを使いたいところですが、WisteriaHillではそんなGPUを積んだPCなど持っていないので、NVIDIA Jetson Nanoを使ってみます。
秋月電子などでいろいろ揃えて15300円くらいで手に入ります(^^)。
ある程度の作業領域が必要なので、JetPack(英語) + Tensorflowのみのシンプルな構成にしておきます。
mnist_deep.pyのソースが公開されているのでこれを使いますが、このままでは結果を出力できません。
mnist_deep.pyのソースをそのまま実行すると以下のようなエラーになります。
tensorflow.python.framework.errors_impl.ResourceExhaustedError: OOM when allocating tensor with shape[10000,28,28,32]
Jetson NanoのGPUメモリーが不足するようです。
ソースの以下の部分にコードを追加し、Tensorflow側で必要な分GPUのメモリを確保します。
参照:TesnsorFlowガイド-> Using GPUs のAllowing GPU memory growth
with tf.Session() as sess:
↓
config = tf.ConfigProto()
#config.gpu_options.allow_growth = True <--有効ではなかったです
config.gpu_options.per_process_gpu_memory_fraction = 0.4
with tf.Session(config=config) as sess:
ソースは以下のサンプルを参照
で、実行します。
$python3 mnist_deep.py
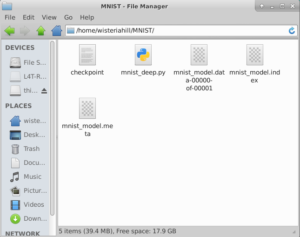
学習モデルが作成されます。
学習済みのモデルを使って、自分の手書き数字を認識してみます。
mnist_deep.pyを少々書き換えてmnist_deep_predict.pyを作成します。
修正は3点
1:import追加
|
1 2 |
import numpy as np from PIL import Image |
2:引数追加
|
1 |
parser.add_argument('--imagefile') |
3:saver = tf.train.Saver()以下を削除して、下のコードと入れ替え
|
1 2 3 4 5 6 7 8 9 10 11 12 13 14 15 16 17 18 19 20 21 22 23 24 |
sess = tf.InteractiveSession() if tf.train.get_checkpoint_state('./'): # Restore print("Restoring...") saver.restore(sess, "./mnist_model") else: print("Model files Not exist.") exit() if FLAGS.imagefile: print('Recognizing %s...' % FLAGS.imagefile) img = np.array(Image.open(FLAGS.imagefile).resize((28,28)).convert('L'), 'f') img = (255-img)/255 img = img.reshape(1, 784) ximage = img.flatten().astype(np.float32)/255.0 x_image = tf.placeholder(tf.float32, [None, 784], name='input') logits, keep_prob = deepnn(x_image) sess.run(tf.global_variables_initializer()) prediction = np.argmax(logits.eval(feed_dict={x_image: [ximage], keep_prob: 1.0})[0]) print(prediction) else: print("Invalid Argumant.") exit() |
手書き数字の画像を例えば7.pngとすると

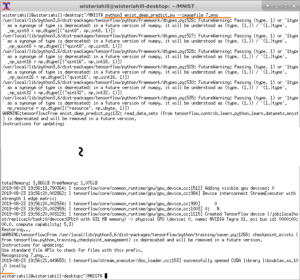
$python3 mnist_deep_predict.py –imagefile 7.png
たまに当たることもあります(^^)。
ソースは以下のサンプルを参照
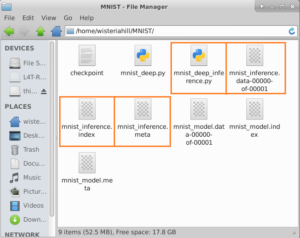
手引きにあるように推論用にmnist_deep.pyを書き換えて、新しいソース(mnist_deep_inference.py)を作ります。
最初に作られたファイルを利用するので、新ソースは同じディレクトリーに置いておきます。
ソースは以下のサンプルを参照
で、実行します
$python3 mnist_deep_inference.py
Graphバイナリーの作成
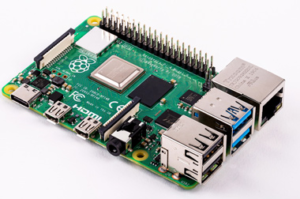
NCSDKは現状Jetsonにインストールできません。まぁ、JetsonでMovidius NCSを使う意味もないですし。
バイナリーの作成はラズパイ3で行います。
Jetsonで作成された3つのファイルをコピーしておきます。
で、実行。
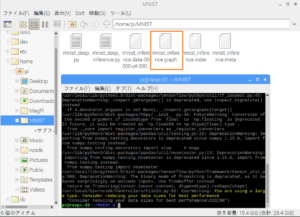
$mvNCCompile mnist_inference.meta -s 12 -in input -on output -o mnist_inference.graph
Next
inference.graphを使って手書き数字の認識
Leave a Reply