
Pi Pico W でWi-Fi 通信をやってみる – Server-Client (メモ)はArduino IDE 版でしたので、今回はC/C++版です。(MicroPython を使いたい場合はこちらを参照)
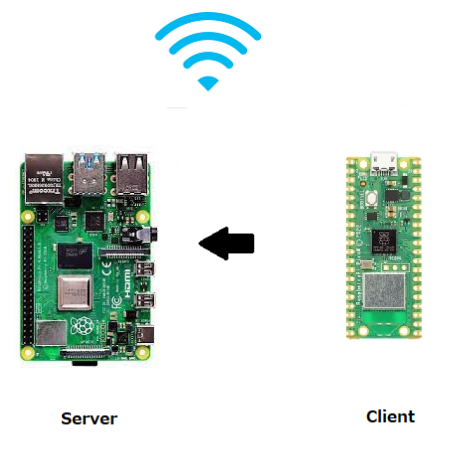
ServerにはRaspberry Pi 4 Model B を使います。
Raspberry Pi 4 のOSイメージはRaspberry Pi OS (64-bit) Desktopを使います。
サンプルでは、Pico W に搭載された温度センサーのデータを10秒間隔で母艦のラズパイに送信して表示してみます。
Raspberry Pi 4 にPico-SDKインストールしておきます。
|
1 2 3 4 5 6 7 8 9 10 11 |
sudo apt update sudo apt install git cmake gcc-arm-none-eabi libnewlib-arm-none-eabi build-essential -y cd ~/ mkdir pico cd pico git clone -b master https://github.com/raspberrypi/pico-sdk.git cd pico-sdk git submodule update --init cd .. |
pico-examplesをクローンしておきます。
|
1 |
git clone https://github.com/raspberrypi/pico-examples.git --branch master |
後々にexamplesを使う場合はビルドしておきますが今回はパス。pico-examplesからマイコン用の軽量TCP/IPスタックのlwipのファイルをお借りします。
注:pico-examples/pico_wにはwifiやbt(Bluetooth)のサンプルがたくさん同梱されていて参考になりますが、そのままではUSBシリアルがモニターできません。ソースに同梱されているCMakeLists.txtに以下を追加記述します。
pico_enable_stdio_usb(xxxxxxx 1)
xxxxxxxの部分はpico_add_extra_outputsの引数を参照
プロジェクトフォルダー(pico-network)を作成します。
|
1 2 3 |
cd ~/pico mkdir pico-network cd pico-network |
最終的にはこんな構造になります。
~/pico/
├── pico-network/
│ ├─ client.c
│ ├─ build/
│ ├─ CMakeLists.txt
│ ├─ lwipopts.h
│ └─ pico_sdk_import.cmake
│
├── pico-examples/
├── pico-sdk/
│ ├── cmake
Client
pico-networkフォルダーにファイルを作成します。
元ネタ The Pico/W In C: Simple Web Client
【client.c】
クライアントコードを記述します。
下記のフルコードには内部温度取得のコードが混ざっています。
温度取得コードの部分はこんな感じです。
|
1 2 3 4 5 6 7 8 9 10 11 12 13 14 15 16 17 18 19 20 21 22 |
#include "hardware/adc.h" void setup_temp() { adc_init(); adc_set_temp_sensor_enabled(true); adc_select_input(4); } int main() { float temp; stdio_init_all(); setup_temp(); temp = 27.0 - ((adc_read() * 3.3 / 4096.0) - 0.706) / 0.001721; } |
温度表示のフォームはこういうふうにしてみます。
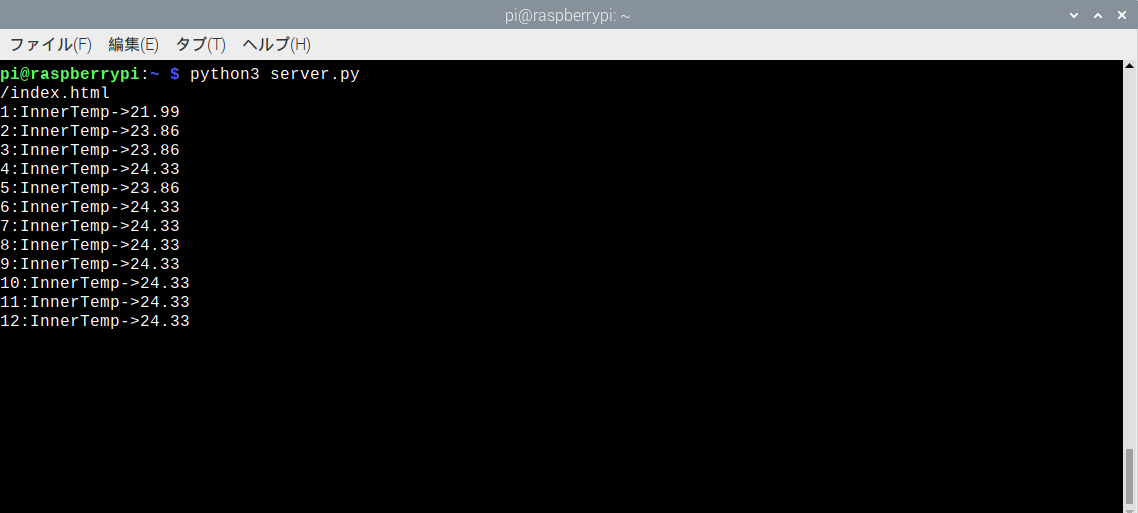
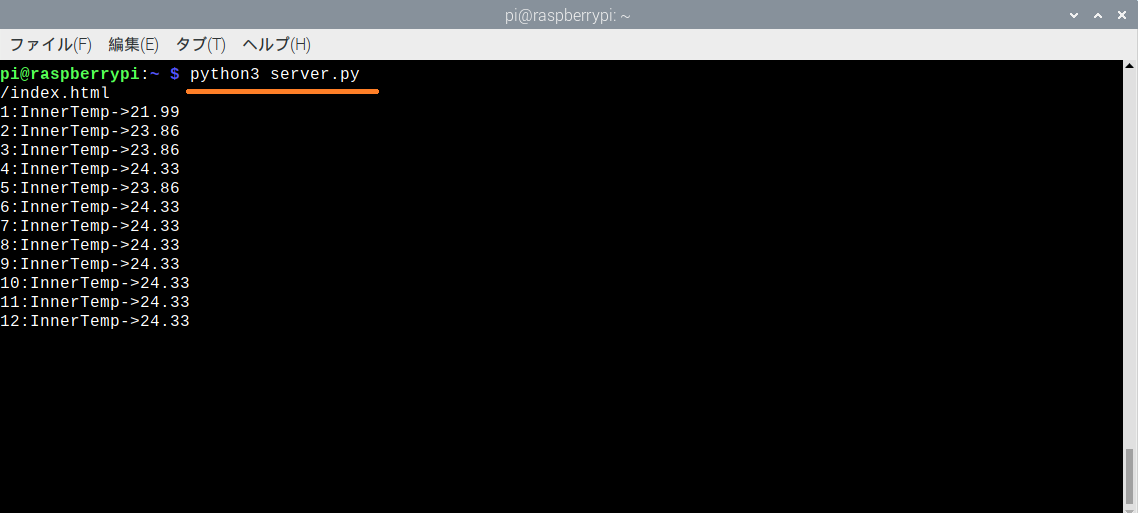
連番:InnerTemp->温度
フルコード
Server を起動するRaspberry Pi 4 のIPアドレス(192.168.0.34)、Wi-Fi のSSID、PASSWORDの部分は書き換えてください。
Server のポートは8000番を使います。問題があればここも書き換えてください。
|
1 2 3 4 5 6 7 8 9 10 11 12 13 14 15 16 17 18 19 20 21 22 23 24 25 26 27 28 29 30 31 32 33 34 35 36 37 38 39 40 41 42 43 44 45 46 47 48 49 50 51 52 53 54 55 56 57 58 59 60 61 62 63 64 65 66 67 68 69 70 71 72 73 74 75 76 77 78 79 80 81 82 83 84 85 86 87 88 89 90 91 92 93 94 95 96 97 98 99 100 101 102 103 104 105 106 107 108 109 110 111 112 113 114 115 116 117 118 119 120 121 122 123 124 125 126 127 128 129 130 131 132 133 134 135 136 137 138 139 140 141 142 143 144 145 146 147 148 149 150 151 152 153 154 155 156 157 158 159 160 161 162 163 164 165 166 167 168 169 170 171 172 173 174 175 176 177 178 179 180 181 182 183 184 185 186 187 188 |
#include <stdio.h> #include "pico/stdlib.h" #include "pico/cyw43_arch.h" #include "lwip/apps/http_client.h" #include "hardware/adc.h" char myBuff[1000]; char ssid[] = "SSID"; char pass[] = "PASSWORD"; uint32_t country = CYW43_COUNTRY_JAPAN; uint32_t auth = CYW43_AUTH_WPA2_MIXED_PSK; char server_addr[] = "192.168.0.34"; uint16_t server_port = 8000; uint16_t cnt = 0; char cnt_buf[10]; char tmp_buf[10]; char cmt_buf[20] = ":InnerTemp->"; char str[30]; void result(void *arg, httpc_result_t httpc_result, u32_t rx_content_len, u32_t srv_res, err_t err) { printf("transfer complete\n"); printf("local result=%d\n", httpc_result); printf("http result=%d\n", srv_res); } err_t headers(httpc_state_t *connection, void *arg, struct pbuf *hdr, u16_t hdr_len, u32_t content_len) { printf("headers recieved\n"); printf("content length=%d\n", content_len); printf("header length %d\n", hdr_len); pbuf_copy_partial(hdr, myBuff, hdr->tot_len, 0); printf("headers \n"); printf("%s", myBuff); return ERR_OK; } err_t body(void *arg, struct altcp_pcb *conn, struct pbuf *p, err_t err) { printf("body\n"); pbuf_copy_partial(p, myBuff, p->tot_len, 0); printf("%s", myBuff); return ERR_OK; } int setup(uint32_t country, const char *ssid, const char *pass, uint32_t auth, const char *hostname, ip_addr_t *ip, ip_addr_t *mask, ip_addr_t *gw) { if (cyw43_arch_init_with_country(country)) { return 1; } cyw43_arch_enable_sta_mode(); if (hostname != NULL) { netif_set_hostname(netif_default, hostname); } if (cyw43_arch_wifi_connect_async(ssid, pass, auth)) { return 2; } int flashrate = 1000; int status = CYW43_LINK_UP + 1; while (status >= 0 && status != CYW43_LINK_UP) { int new_status = cyw43_tcpip_link_status( &cyw43_state,CYW43_ITF_STA); if (new_status != status) { status = new_status; flashrate = flashrate / (status + 1); printf("connect status: %d %d\n", status, flashrate); } cyw43_arch_gpio_put(CYW43_WL_GPIO_LED_PIN, 1); sleep_ms(flashrate); cyw43_arch_gpio_put(CYW43_WL_GPIO_LED_PIN, 0); sleep_ms(flashrate); } if (status < 0) { cyw43_arch_gpio_put(CYW43_WL_GPIO_LED_PIN, 0); } else { cyw43_arch_gpio_put(CYW43_WL_GPIO_LED_PIN, 1); if (ip != NULL) { netif_set_ipaddr(netif_default, ip); } if (mask != NULL) { netif_set_netmask(netif_default, mask); } if (gw != NULL) { netif_set_gw(netif_default, gw); } printf("IP: %s\n", ip4addr_ntoa(netif_ip_addr4(netif_default))); printf("Mask: %s\n", ip4addr_ntoa(netif_ip_netmask4(netif_default))); printf("Gateway: %s\n", ip4addr_ntoa(netif_ip_gw4(netif_default))); printf("Host Name: %s\n", netif_get_hostname(netif_default)); } return status; } void setup_temp() { adc_init(); adc_set_temp_sensor_enabled(true); adc_select_input(4); } int main() { float temp; stdio_init_all(); setup(country, ssid, pass, auth, server_addr, NULL, NULL, NULL); setup_temp(); httpc_connection_t settings; settings.result_fn = result; settings.headers_done_fn = headers; err_t err = httpc_get_file_dns( server_addr, server_port, "/index.html", &settings, body, NULL, NULL ); printf("status %d \n", err); while (true){ sleep_ms(10000); // cnt++; snprintf(cnt_buf, 10, "%d", cnt); // temp = 27.0 - ((adc_read() * 3.3 / 4096.0) - 0.706) / 0.001721; snprintf(tmp_buf, 10, "%.2f", temp); // snprintf(str, 30, "%s%s%s",cnt_buf,cmt_buf,tmp_buf); // err_t err = httpc_get_file_dns( server_addr, server_port, str, &settings, body, NULL, NULL ); } } |
【CMakeLists.txt】
CMakeLists.txtを記述します。
内部温度取得用に、target_link_librariesにhardware_adcが追加されています。
|
1 2 3 4 5 6 7 8 9 10 11 12 13 14 |
cmake_minimum_required(VERSION 3.13) include(pico_sdk_import.cmake) project(client_project C CXX ASM) set(CMAKE_C_STANDARD 11) set(CMAKE_CXX_STANDARD 17) pico_sdk_init() add_executable(client client.c ) pico_enable_stdio_usb(client 1) pico_enable_stdio_uart(client 1) pico_add_extra_outputs(client) target_include_directories(client PRIVATE ${CMAKE_CURRENT_LIST_DIR} ) target_link_libraries(client pico_cyw43_arch_lwip_threadsafe_background pico_stdlib pico_lwip_http hardware_adc) |
pico_sdk_import.cmakeをコピーしておきます。lwIP スタックに必要なファイルもコピーしておきます。
|
1 2 |
cp ../pico-sdk/external/pico_sdk_import.cmake . cp ../pico-examples/pico_w/wifi/lwipopts_examples_common.h lwipopts.h |
ビルド
Client用のファームウェアを作成します。
|
1 2 3 4 5 |
mkdir build cd build export PICO_SDK_PATH=../../pico-sdk cmake -DPICO_BOARD=pico_w .. make |
buildフォルダーに client.uf2が作成されているのを確認。
Server起動
サーバー側はPython で記述してみます。
サーバーのアドレスはラズパイのそれで、8000番のポートを使います。Client側でポート番号を変更した場合はこちらでも変更してください。
192.168.0.34の部分はご自分の環境で書き換えてください。
【server.py】
|
1 2 3 4 5 6 7 8 9 10 11 12 13 14 15 16 17 18 19 20 21 22 23 24 25 26 27 |
import socket import random BUF_SIZE = 2048 random_list = [] for n in range(BUF_SIZE): random_list.append(random.randint(0, 255)) write_buf = bytearray(random_list) sv = socket.socket( socket.AF_INET ) sv.bind( ( "192.168.0.34", 8000 ) ) sv.listen() while True: client, addr = sv.accept() write_len = client.send(bytearray(write_buf)) data = client.recv(BUF_SIZE) if len(data) == 0: break cont = data.decode("utf-8") #print(cont) listA = cont.splitlines() #print(listA[0]) listB = listA[0].split(" ") print(listB[1]) client.close() |
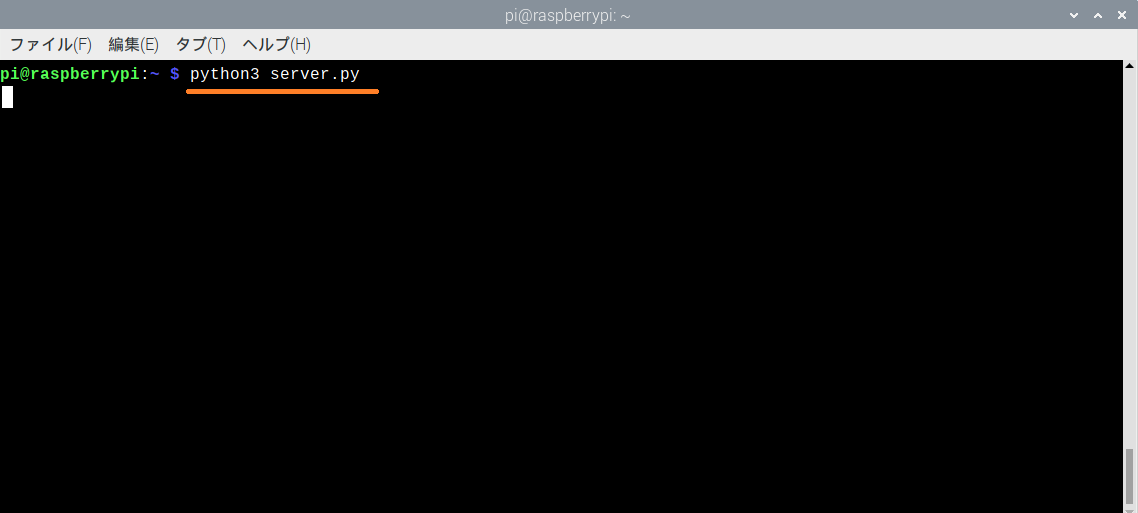
まず、Server を起動しておきます。
Client 起動
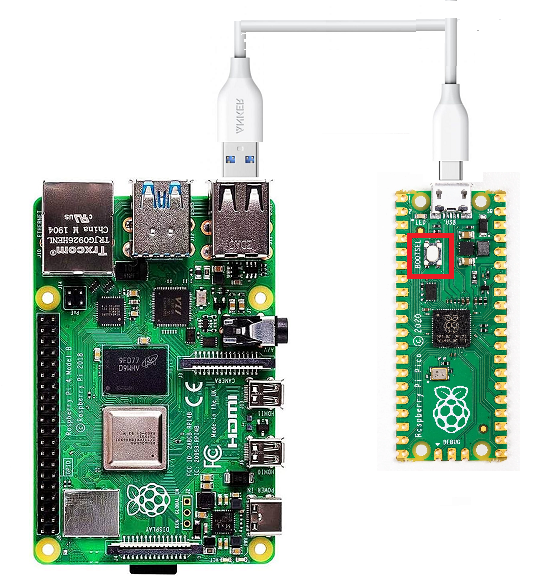
PicoのBOODELボタンを押しながらMicroUSBケーブルで接続すると、RPI-RP2フォルダーが開きます。
フォルダーにclient.uf2をドラッグ・ドロップするとPicoが再起動します。。
プログラムが実行されて10秒間隔でデータが送られ、サーバー側で表示します。
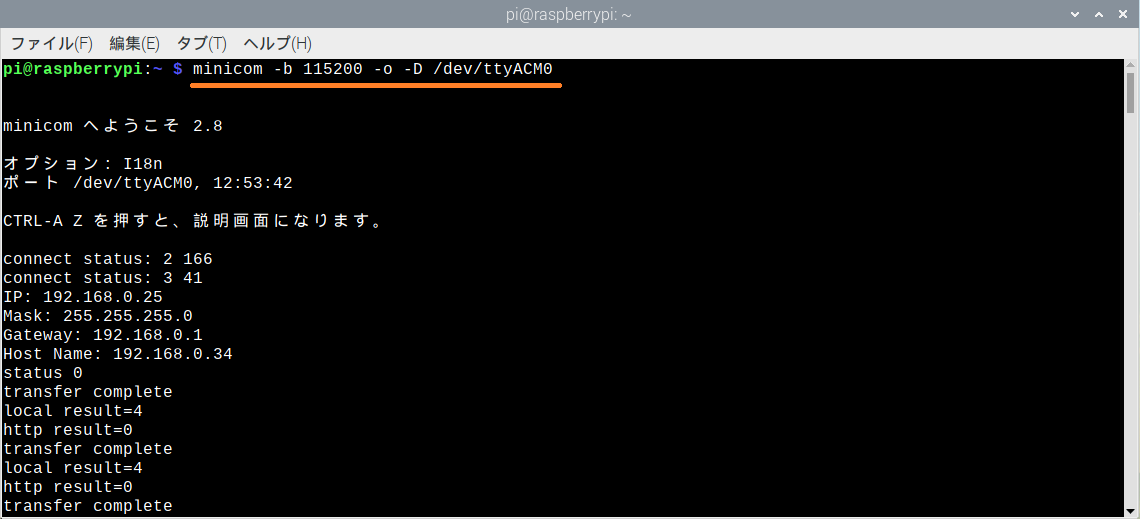
Pico W 側のシリアルポート確認してみます。
minicomを使います。
|
1 |
sudo apt install minicom -y |
起動
|
1 |
minicom -b 115200 -o -D /dev/ttyACM0 |
Pico とラズパイをケーブルで再接続します(今回はBOOTSELボタンは使いません)。
minicomの画面にIPアドレスなどの情報が表示されています。
Pi Pico W でWi-Fi 通信をやってみる(1) – Server-Client (メモ)
Leave a Reply