
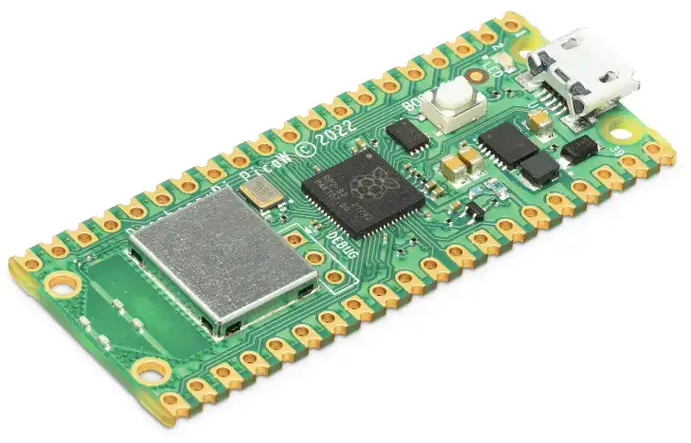
Raspberry Pi Pico W は無線通信チップを搭載した安価(1210円)なマイコンです(現時点ではWi-Fi のみでBluetooth は無効になっています…….多分)。
半導体不足が言われていた発売当初はなかなか手に入りませんでしたが、現在供給は安定しているようです。
ヘッダーピンは自分で半田付けしないといけませんが、何といってもこの価格は魅力的です。
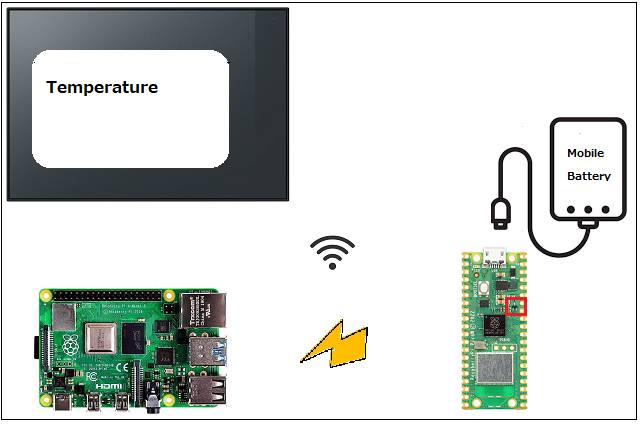
ここでは、こういうことをやってみます。Pico W は内部温度センサーを持っているのでこの値を取得してラズパイに送信して表示してみます。
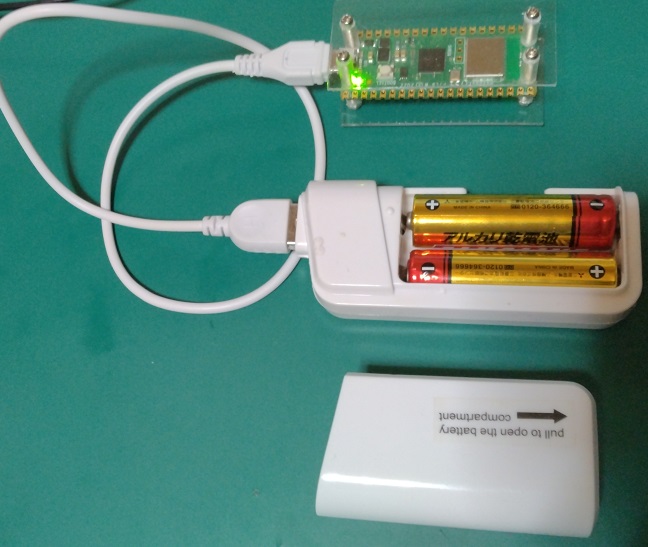
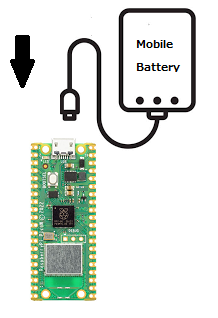
外部バッテリは1.8V~5.5Vの電源を使用すれば、内部回路で3.3Vを維持してくれます。
リチュウムイオン・モバイルバッテリの場合、途中で給電が停止するタイプもあるので注意が必要です。
乾電池式のモバイルバッテリで動作は確認済
送受信はsocketでユニキャストします。受信側のラズパイではIPアドレスは固定にしておきます。
Pico はマイコンなので、コードはmain.pyで保存しておけば、電源供給された時点で起動します。
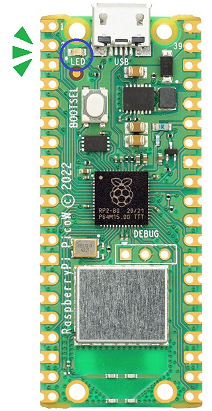
送信側のPico W は通信状態確認にLチカを使ってみます。
受信側のラズパイはデータ表示にTkinterを使ってみます。
送信側(Pico W)のコード
開発環境はThonny でMicropython を使います。
環境のセットアップは以下を参照
Pi PicoにMicroPythonをセットアップして実行してみる(メモ)
送信側では4つの機能を1つにします。
1:Wi-Fi ネットワークに接続
|
1 2 3 4 5 6 7 8 9 10 11 12 13 14 15 16 17 18 19 20 21 22 23 24 |
import time import network ssid = '<SSID>' password = '<パスワード>' wlan = network.WLAN(network.STA_IF) wlan.active(True) wlan.connect(ssid, password) max_wait = 10 while max_wait > 0: if wlan.status() < 0 or wlan.status() >= 3: break max_wait -= 1 print('waiting for connection...') time.sleep(1) if wlan.status() != 3: raise RuntimeError('network connection failed') else: print('connected') status = wlan.ifconfig() print('ip = ' + status[0]) |
2:内部温度センサーの値を取得
|
1 2 3 4 5 6 7 8 9 10 11 12 13 14 |
import machine import utime sensor_temp = machine.ADC(4) conversion_factor = 3.3 / (65535) while True: reading = sensor_temp.read_u16() * conversion_factor # The temperature sensor measures the Vbe voltage of a biased bipolar diode, connected to the fifth ADC channel # Typically, Vbe = 0.706V at 27 degrees C, with a slope of -1.721mV (0.001721) per degree. temperature = 27 - (reading - 0.706)/0.001721 temp_info = "Temp:" + str(temperature) #5秒間隔 utime.sleep(5) |
3:ユニキャスト
|
1 2 3 4 5 6 7 8 9 10 11 12 13 14 15 16 17 18 19 20 21 22 23 24 |
import socket HOST = '<固定IPアドレス>' PORT = 51000 def com_send(mess): while True: try: # 通信の確立 sock = socket.socket(socket.AF_INET, socket.SOCK_STREAM) sock.connect((HOST, PORT)) # メッセージ送信 sock.send(mess.encode('utf-8')) # 通信の終了 sock.close() break except: print ('retry: ' + mess) #キャスト com_send("ok") |
4:Lチカ
LEDを点灯/消灯します。”LED”は”WL_GPIO0″でも可。Pico とはここが違っています。LEDの接続が異なっているので、Pico は25を指定していましたが、W では25を指定してもLチカしません。
|
1 2 3 |
import machine import utime led = machine.Pin("LED", machine.Pin.OUT) |
点灯
|
1 |
led.on() |
消灯
|
1 |
led.off() |
これらを1つにまとめてみます。
固定IPアドレス、SSID、パスワードはご自分ので置き換えてください。
【main.py】
|
1 2 3 4 5 6 7 8 9 10 11 12 13 14 15 16 17 18 19 20 21 22 23 24 25 26 27 28 29 30 31 32 33 34 35 36 37 38 39 40 41 42 43 44 45 46 47 48 49 50 51 52 53 54 55 56 57 58 59 60 61 62 63 64 65 66 67 68 69 70 71 72 73 74 75 76 77 |
import machine import utime import time import socket import network #ラズパイに設定した固定IPと使用するポート番号 HOST = '<固定IPアドレス>' PORT = 51000 #温度取得と通信のインターバル(秒) interval = 5 #内部温度 sensor_temp = machine.ADC(4) conversion_factor = 3.3 / (65535) #Lチカ led = machine.Pin("LED", machine.Pin.OUT) #Wi-Fiネットワーク接続 ssid = '<SSID>' password = 'パスワード' wlan = network.WLAN(network.STA_IF) wlan.active(True) wlan.connect(ssid, password) max_wait = 10 while max_wait > 0: if wlan.status() < 0 or wlan.status() >= 3: break max_wait -= 1 print('waiting for connection...') time.sleep(1) if wlan.status() != 3: raise RuntimeError('network connection failed') else: print('connected') #LED点灯 led.on() status = wlan.ifconfig() print('ip = ' + status[0]) #ユニキャスト def com_send(mess): while True: try: # 通信の確立 led.on() sock = socket.socket(socket.AF_INET, socket.SOCK_STREAM) sock.connect((HOST, PORT)) # メッセージ送信 sock.send(mess.encode('utf-8')) # 通信の終了 led.off() sock.close() break except: print ('retry: ' + mess) led.off() #一定間隔で内部温度を取得してキャスト while True: reading = sensor_temp.read_u16() * conversion_factor temperature = 27 - (reading - 0.706)/0.001721 temp_info = "Temp:" + str(temperature) com_send(temp_info) utime.sleep(interval) |
受信側(ラズパイ)のコード
表示用ウィンドウサイズは350x200、文字の色は赤
Pico W は内部クロックを持っていないのでRTCモジュールを使わない場合、時刻はラズパイ側で取ります。
【receive.py】
|
1 2 3 4 5 6 7 8 9 10 11 12 13 14 15 16 17 18 19 20 21 22 23 24 25 26 27 28 29 30 31 32 33 34 35 36 37 38 39 40 41 42 43 44 45 46 47 48 49 50 51 52 53 54 55 56 57 58 59 60 61 62 63 64 65 66 67 68 69 70 71 72 73 74 75 |
import tkinter from tkinter import ttk from socket import socket, AF_INET, SOCK_STREAM import threading import time HOST = '<固定IPアドレス>' PORT = 51000 MAX_MESSAGE = 2048 NUM_THREAD = 4 CHR_CAN = '\18' CHR_EOT = '\04' cuiroot = tkinter.Tk() cuiroot.title(u"information panel") cuiroot.geometry("350x200") var1 = tkinter.StringVar() def com_receive(): #global sock sock = socket(AF_INET, SOCK_STREAM) sock.bind ((HOST, PORT)) sock.listen (NUM_THREAD) print ('receiver ready, NUM_THREAD = ' + str(NUM_THREAD)) while True: try: conn,addr = sock.accept() mess = conn.recv(MAX_MESSAGE).decode('utf-8') conn.close() if(mess == CHR_EOT): break if(mess == CHR_CAN): continue now = time.localtime() datetime = str(now[0]) + "/" + str(now[1]) + "/" + str(now[2]) + " " + str(now[3]) + ":" + str(now[4]) + ":" + str(now[5]) message('MESSAGE:\n\n' + mess + "\n\n" + datetime) except: print('Error') sock.close() def message(mes): var1.set(mes) def com_start(): th=threading.Thread(target=com_receive) th.start() frame1 = ttk.Frame( cuiroot, padding=5) frame1.grid() label1 = tkinter.Label( frame1, anchor="nw", width=40, height=20, foreground="#ff0000", background='#000000', textvariable=var1) label1.grid(row=2,column=1) com_start() cuiroot.mainloop() |
●ラズパイ側でレシーバー 起動
python3 receive.py
●Pico W 起動
電源投入
Appendix

Leave a Reply